In what is a continuation of my original article on “Training a Neural Network to Autoshoot in FPS Games.” in this short series of articles I will be exploring the application of Machine Learning (ML) and Artificial Neural Networks (ANN) to implement an Artificial Intelligence (AI) which is able to us real-time training to create a model which can identify targets in, although not limited to, Valve Software’s game of Counter-Strike Global Offensive.
The first port of call for this series was to do a quick implementation using the resources I already had available to me, and in this case that was TFCNNv2, a simple yet feature-rich C library I had been working on which implements classical Feed-Forward Neural Networks.
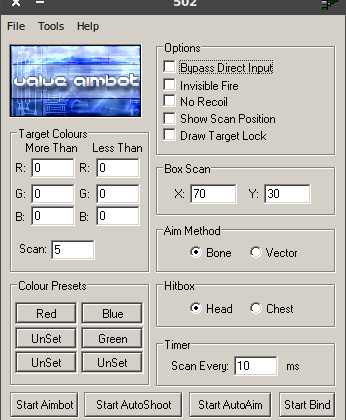
I had been playing Counter-Strike 1.6, CZ, and Source in my younger years, and even back then I had been interested in writing external software programs that could detect enemies from just reading pixel colour information from the screen from those early days, as such in 2006 at the age of 18 I released what would be version four of a simple colour detection aimbot I had been working on called the “[Valve] Aimbot”, the name inspired by my interests in paying Valve Software First-Person Shooter games.
Back then I knew very little about mathematics other than the basics you’d expect anyone to know at that age — a little trigonometry but that was about it. I had heard of machine learning and had a vague interest in the concept but other than implementing a library like OpenCV at a very functional level I really had no idea how I would go about setting up a neural network. I had some ideas of my own concerning average detection and scoring of image pixel data but it’s nothing that anyone else could not have thought up on their own either. It was all rather rudimentary.
The thing is, when I came to create the TFCNN project, it was not to create another Machine Learning library to benchmark against the MNIST dataset, rather, it was a project created to teach myself about Neural Networks while having a little bit of fun and one others could use to teach themselves, and have their own fun.
So having had a history with Counter-Strike, and my first ventures into Neural Networks being targeted at FPS games I figured this would be an apt continuation, and one I hope many of you will find enjoyable to read about.
This bot will actually work for any FPS game that runs under Linux, although the solution is not difficult to port over to Windows, which I will be covering in one of the later parts to this series, I will initially only be targeting Linux.
The first implementation was simple, I created a basic shell program that listened for keystrokes to activate features and allowed the user to train a 30-pixel area around the center of the reticule.
The function set essentially rounding to;
L-CTRL + L-ALT = Toggle BOT & HOTKEYS ON/OFF
T = Toggle auto-shoot
P = Toggle crosshair
C = Output input array from reticule area.
G = Get activation for reticule area.
Q = Train on reticule area.
E = Un-Train on reticule area.
I had a superfluous crosshair option because when training the network it’s best to have the crosshair disabled so that it does not affect the training data — if you have the option to disable it. Luckily for me in CS:GO I was able to set the opacity to zero which effectively completely removed the crosshair from view. This way if I desired to enable a crosshair I had a quick toggle option without having to jump into the in-game menu. Also, I had a crosshair to no-scope with (sssh, don’t tell Gabe).
I did exchange a few emails with Gabe as an adolescent but that’s a story for another time, and I called in once and spoke to some one high up called Tim if I remember correctly who was very polite, interesting, and at the time was working on the networking for some the projects at Valve Software. That was just me being inquisitive in the best of my autistic ways.
The other main features of this shell program was the ability to Train and De-Train the Feed-Forward Neural Network on this 30-pixel sample of pixels from the center of the screen. When Training a green box would be drawn around the sample area and when De-Training a red box would be drawn. This allows one to accurately frame the targets the neural network was being trained on.
Finally, there was also the option to test the accuracy of the network, in a similar way to training it would show the same green and red boxes but this time to show if the detection was positive (shoot) or negative (don’t shoot).
Some technical details, while the original FPS neural network was trained on 0 to 1 normalised pixel data I found that for this application I had the best results using -1 to 1 mean normalised pixel data. I used the Glorot Normal weight initialisation, Elliot sigmoid activation function, and the Nesterov Gradient Descent Optimisation algorithm. I experimented with learning rates of 0.01 to 0.3 and a unit dropout of 0.13 to 0.5. The network itself was 3 layers deep with 256 units per layer, although I started at 64 and tried all powers of two between 64 and 512.
The results were not terrible but not appliable either, I was unable to quickly train the neural network to significantly recognise player faces. In a simpler machine learning task such as the original, I do not doubt that I would have had much better success.
I was not surprised as Feed-Forward Neural Networks are not renowned for their proficiency in computer vision tasks, and that’s why in part 2 I will be demonstrating the use of a cut down version of the VGG network which is a network named after the Visual Geometry Group of Oxford University in the United Kingdom. It was first proposed by Karen Simonyan and Andrew Zisserman and had competitive detection accuracy to performance with GoogleLeNet.
Also, I have started to consider that maybe I will begin to collect the samples taken to compare the detection accuracy of real-time training to offline training. The problem is that most end-users can intuitively real-time train but do not generally have the means for offline training.
If you would like to test the solution described in this article, please hop over to this page on GitHub. It does require some basic technical prowess of copying TFCNNv2.h into the same directory and executing the GCC or CLANG compile command. Although maybe by the end of this series I will have released Windows and Linux binaries ready-to-go! Who knows, let’s wait and see?
I hope to see you back for Part 2 when I expect to have a little more success!