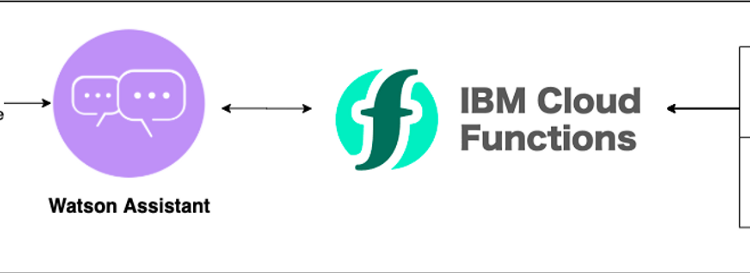
Adding dynamic content to your chatbot is a simple process using webhooks with Watson Assistant. Why add dynamic content? Foremost, manually managing static content for a chatbot is tedious and prone to error, and secondly, this gives a more interesting chatbot that can return a broader range of answers. As a chatbot enthusiast, I want to share what I’ve learned while exploring the usage of IBM native tools with others so that others will adopt this approach.
Fundamentals
Watson Assistant makes it very easy to add dynamic content and flow to conversations using webhooks.
Before we go further, let’s define what a webhook is.
Webhooks typically are used to connect two different applications. When an event happens on one application, it serializes data about that event and sends it to the second application using a webhook URL.
To read more, please see this post. In this solution, we will be using Watson Assistant’s webhook feature to connect to IBM Cloud Functions to make external API calls and return the response.
Process
In this example, we will be working to serve dynamic content for a chatbot to either give a random cocktail recipe or a random fact, depending on what the user requests.
To start, login to an IBM Cloud account (if you don’t have an IBM Cloud account, create one) and create a free Watson Assistant instance. Next, we will create intents. In a chatbot, intent means what type of request the user makes. For this chatbot, we will create two intents: 1) FACT — a random fact, and 2) COCKTAIL — a random cocktail recipe.
Below you can see some examples for #cocktail intent — The examples for an intent will help train Watson assistant to understand user requests.
Now, that we have created the content of the chatbot with the intents, we move on to configuring the IBM Cloud Functions. First, go to the IBM Cloud catalog and search for functions and create an action, naming it and choosing the runtime environment. Here, I created a NodeJS action (other languages are available as well including Java and .NET)
In the code below, you can see that we pass the parameters — in this case, the user intent — and use this as the basis for which API is called. The API endpoint then ideally returns a response, in this case, a string containing either a random fact or a random cocktail recipe. The response is then parsed and returned to the chatbot.
let rp = require('request-promise')
function main(params) {const options ={
if (params.action == 'fact'){
json:true
}
options.uri = "https://uselessfacts.jsph.pl/random.json?language=en";return rp(options)
.then (res => {
return {response :res.text}
})
}if (params.action == 'recipe'){
options.uri = "https://www.thecocktaildb.com/api/json/v1/1/random.php";return rp(options)
.then (res => {
return {response :res.drinks[0].strInstructions}
})
}}
Next, we should test our actions. We can see how well the actions work by passing the value of the action parameter and see what we get back in both cases.
To test this, Click Invoke with parameters and add the object as shown below, and click Invoke This will be a test to check if the actions function returns a fact.
Do the same to test if the action returns a random cocktail recipe. To retrieve a random recipe for a cocktail. Click Invoke with parameters and add the object as shown below and click Invoke.
Now that we have tested both the cases, Click on Endpoints on the left hand side and Check the Enable as Web Actions and copy the URL from the HTTP Method — we will need this to make the connection between our action and our Watson Assistant instance.
Finally, we will return to our Watson Assistant instance and configure the dialog section.
We will start with configuring and setting up the dialog for sharing a random cocktail recipe. First, create the dialog and customize it by enabling the Customize to webhook/actions skill on the dialog. Choose the call out to webhook option.
In parallel to our setup in the IBM Cloud functions page, we add a parameter to the dialog where the key is called action and the value is recipe. We receive the response from the IBM Cloud functions based on these settings, including the URL. We call the return variable webhook_result_1 and the response webhook_result_1.response is parsed and returned to the user. If there is no response, the chatbot will reply with “I was not able to find something for you.” Repeat this process for the dialog for sharing a random fact.
Our final step in configuring our chatbot is from the Dialogs page go to Options->Webhooks and enter the URL for the function endpoint we copied from our earlier step.
Now, in contrast to the official documentation, and this is very important — add .json to the end of the URL or you will receive an error that states a Content-Type HTTP header is missing.
Now, you can quickly test the chatbot in the Watson Assistant interface. Asking for a “fact” should return a fact, and asking for the bot to share a recipe should result in the bot returning a cocktail recipe.
Conclusion
Watson Assistant and IBM Cloud empower a developer to quickly create a more interesting chatbot with APIs. While the current documentation does have the one noted error, the process is very straightforward and can be implemented in a matter of minutes and I recommend you try it out for yourself!
Links to check out:
Watson Assistant: https://www.ibm.com/cloud/watson-assistant-2/
API Docs: https://cloud.ibm.com/docs/assistant?topic=assistant-dialog-webhooks
