Before we can get started with this project I would like to make a disclaimer on the expected skills and resources required to complete the project. As I will not be providing whole sections of code for some vital parts of the project, it is essential that individuals reading this tutorial have at least a basic to intermediate level of coding expertise in their language of choice. As for me, I will be using Python for most parts of the project however, I will also be using Javascript and HTML/CSS for parts of the frontend/webpage. Here is the list of pre-requisites and resources we will be using for this project listed in a neat and concise manner.
Programming Languages:
- Python
- HTML/CSS (Basic)
- Javascript (Basic)
- YAML (Using Swagger Framework)
AWS/Cloud Services:
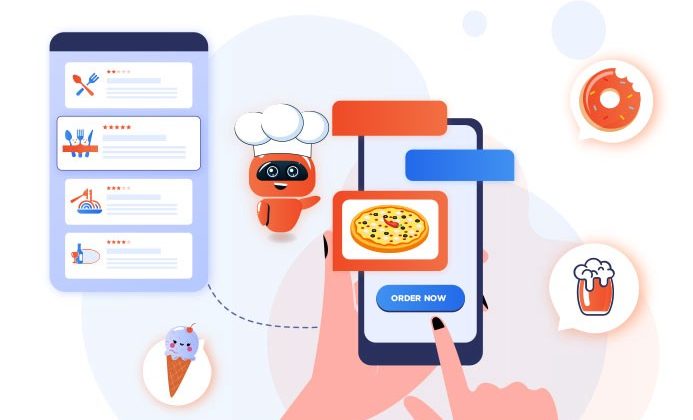
In this project, we will implement a serverless, microservice driven web application. Specifically, we will build a dining concierge chatbot that sends you restaurant suggestions given a set of preferences that you provide to the chatbot through conversation. The preferences involve details like your location, your cuisine of choice, the time you would like to visit the restaurant, etc. Displayed above is the front-end of the application which will be used to converse with the user and attain intents and slots (We delve into detail on each of these a little later when we talk about AWS Lex) which will be leveraged to query our database and return a restaurant recommendation. We use Amazon Lex for conversational understanding and the Yelp API to scrape information about restaurants and save it in DynamoDB and/or Elasticsearch. For simplicity, we will break the project down into 5 parts. Today I will go through part 1, 2 and half of part 3 for the project before releasing a subsequent post(s) next week to complete the rest of the parts.
- Front-End and website hosting on S3
- API Gateway and AWS Lambda
- Amazon Lex (Intents, Slots and Customizing)
- Yelp API for restaurant scraping and DynamoDB /Elasticsearch
- AWS SQS (Simple Queuing Service) and AWS SNS (Simple Notification Service) for decoupled restaurant suggestion delivery.
Develop Front-End Code:
We start by building the front-end of the webpage using HTML/CSS. For reference purposes here is a snippet of the code that was used for the front-end (This code was attained from our class facilitator/guest lecturer Mr. Andrei Papancea and was not authored by me.)
You are free to use your own front-end else here is the link to the front-end code used in this project (In order for the front-end code to appear and function exactly as displayed in the introduction section, access to the javascript files with the front-end logic is required, however, this has not been provided due to the fact that the code is part of an active class at Columbia Univeristy). Once we have the HTML page that we would like to use we can proceed to setup our S3 bucket and to hosting our webpage.
S3 Static Webpage Hosting:
Now that we have our front-end webpage ready we need to host it in order for it to be accessible to the public. We can easily do this with Amazon’s S3 buckets. What is S3? S3 stands for Simple Storage Service and is Amazon’s storage service that allows us to store and retrieve any amount of data, at any time, from anywhere on the web. Oftentimes when working with machine learning projects we need to store and use a large amount of data that should be easily accessible, cheap to store and highly scalable/flexible. Amazon’s S3 provides us all of these features in a neat and robust solution called S3 (Free Tier allows us to store 5GB free per month and costs in general are extremely low). Using S3 buckets we can store a large amount of data on the web which can then be accessed programmatically from our work environment (IDE, Jupyter Notebook, etc.) using tools like boto3 (Python). For more information on S3 and it benefits click here!
Okay now lets set up our bucket and configure it for hosting. In order to create a bucket we follow a fairly simple process. Here is the guide for creating a bucket and attached below are screenshots of the same.
In the above process instead of blocking public access in step 5 we will uncheck this box in order to ensure that we can access our website from any device and leave the rest of the settings as default. Now we can click create bucket and we should have a S3 bucket ready for use in just few seconds. (Screenshot attached below)
Once we create our bucket we will configure the bucket for website hosting. In order to do this follow steps 2 through steps 6 at the the following link. We basically need to configure the bucket such that it allows public access to the bucket.
Key Points:
- In step 4 when copy-pasting the policy be sure to replace “arn:aws:s3:::
example.com/*” with your bucket ARN, for example in my case my bucket is called restaurant-chatbot-demo so the ARN would be “arn:aws:s3:::restaurant-chatbot-demo/*” This can be found on the properties tab of your bucket. - In step 2 we need to specify the index file that will serve as the the front-end code for the website. In my case I uploaded the HTML File that would serve as the front end and renamed it to index.html.
- In my case I will also upload the assets folder with the javascript files required for my front end to function. (As mentioned earlier access to the assets folder has not been made publically available as the code is not owned by me.)
Having done all of the above steps we now have an S3 bucket that will host the index.html page at a particular URL which can be publically accessed. Attached below is a screenshot of the contents of my bucket.
API Gateway
In this section we will talk about AWS API Gatewate and AWS lambda. API’s are extremely vital parts of moder day apps and services. API’s serve as the gatekeeper, connecting the outside world to all of our apps, services and business logic and processing user requests and interactions to display the appropriate results. In the case of AWS, API Gateway is their API service that enables us to connect our backend logic to the frontend.
API Gateway is not the final destination for a particular HTTP request. Rather, it is an intermediary between a client that is making a request and the service that the client is consuming. We can think of API’s as the link that connects the user to the most important element ie the integration. The integration is where API Gateway will route your request once it passes authorization and validation. For detailed information on AWS API Gateway refer to this blog!
We can build API’s with API Gateway either from scratch or by importing YAML files that contain API definition and documentation. When we sign-in to AWS API Gateway we get the following page.
We will create a normal RestAPI by importing the following YAML file which was provided to us by the class facilitator.
With that step complete we are done with the basic setup for our API. We will need to complete a couple of more steps like deploy the API and use the invoke URL, enable CORS (Cross Origin Reseource Sharing) and a couple of other things to get the system to work effectively. So lets get into it.
CORS (Cross Origin Resource Sharing):
Cross-Origin Resource Sharing (CORS) is an HTTP-header based mechanism that allows a server to indicate any other origins (domain, scheme, or port) other than its own from which a browser should permit loading of resources. It basically aims to allow requests made on behalf of you and at the same time block some requests made by rogue JavaScript. Here are a couple of examples of requests that can be made.
- a different domain (eg. site at example.com calls api.com)
- a different sub domain (eg. site at example.com calls api.example.com)
- a different port (eg. site at example.com calls example.com:3001)
- a different protocol (eg. site at https://example.com calls http://example.com)
This mechanism prevents attackers that plant scripts on various websites (eg. in ads displayed via Google Ads) to make an Ajax call to www.yourbank.com and in case you were logged in making a transaction using your credentials. Thus CORS is an essential and vital part of maintaining security and provided access only to the required entities on the web. Click here! to learn more about CORS through another great medium article.
In our case we need to enable CORS for our API to allow our S3 bucket to be accessed by users and to allow fulfillment of our business logic by AWS lambda functions. Before we enable CORS we want our POST method for the API to be fulfilled by a AWS lambda function. In order to do this we select Lambda function as the integration type. We then can select the require AWS Lambda function in the lambda function field in the below screenshot. We then click save and move on to CORS setup.
In order to enable CORS we follow the following steps.
- Select the POST method and then click the actions dropdown menu visible in the picture above
- Click enable CORS
- Select POST and OPTIONS Methods also make sure to check default 4XX and 5XX
- We are likely to get a few error for the OPTIONS method like below.
In order to fix this we need to click the OPTIONS under chatbot. Then click method response and add 200 as a header like so.
With these steps done we are done with the configurations for our API and can now go ahead and deploy the same. To deploy the API click the actions drop-down menu once again and select Deploy API. We select a new stage for deployment named test/dev and deploy the API to retrieve our invoke URL.
Once we have deployed the API using the above steps we now have the invoke URL that we can use to integrate our front end with the API. In my case this URL was used as part of the javascript files that linked the POST requests to the frontend HTML in my S3 bucket. Having used this URL in my javascript file I re-uploaded the file to my restaurant-chatbot-demo S3 bucket from the previous section. With that we have now completed part 2 of the tutorial which involved API Gateway integration.
The last topic for today is an introduction to Amazon Lex. We will delve into the details of the setup in the next post however this part will try to give you a better understanding of what Lex can or cannot do.
Lex is Amazon’s conversational/chatbot service that enables us to easily and quickly build conversational interfaces for our applications. In simple terms, it enables us to build a voice or text controlled chatbot which can be deployed as part of any application or as a standalone service itself. One can use Lex for answering customer service questions, ordering pizza, asking for details of an order and other logistics and a host of other use cases.
The basic building blocks of lex
A. Intent:
An intent represents an action that the user wants to perform. You create a bot to support one or more related intents. For example, you might create a bot that orders pizza and drinks. The chatbot needs to be able to tackle each situation differently. When the person says they want to order a pizza we need to start displaying the pizza menu with the choices for sauce, toppings, etc. When the person wishes to order drinks our chatbot needs to understand the intent and adapt accordingly, displaying the various mocktails and cocktails available on the menu. Thus an intent depicts what the user/customer wishes to do. For each intent, you provide the following required information:
- Intent name– A descriptive name for the intent. For example, OrderPizza or OrderDrinks. Intent names must be unique within your account.
- Sample utterances — How a user might convey the intent. For example, a user might say “Can I order a pizza ?” or “I want to order a pizza”. The sample utterances and sentences similar to them is what helps the chatbot understand what is the users intention. So when the customer says “I want to order a pizza” Lex needs to understand that we now need to retrieve the pizza menu from our database and display it on the front end. Thus sample utterances are a way of telling Lex what sentences to look out for in order to execute code/logic related to a certain intent. This is kind of like how “Alexa” or “Hey Google” tells our voice assistants to start listening to what we want them to do for us.
- How to fulfil the intent — In this part we need to specify how you want to fulfil the intent after the user provides the necessary information (for example, once the customer chooses the pizza she/he would like to have we need our application to send the order details to the pizza shop, thus we need to add in a fulfilment function that can complete the loop). It is recommended that one creates a Lambda function to fulfil the intent.
B. Slots:
Slots can be likened to parameters in a function. They are basically the variables that may or may not be specified by the user as part of the customer interaction with the chatbot. An intent can require zero or more slots or in order to fulfil the business logic.
For example, in order to create a pizza, you need to have a base/crust so one of the slots in the OrderPizza Intent would be Crust. You add slots as part of the intent configuration. At runtime, Amazon Lex prompts the user for these specific slot values and retrieves the corresponding entries. The user must provide values for all required slots before Amazon Lex can fulfil the intent.
For each slot, one must also provide slot type and a prompt for Amazon Lex to send to the client to elicit data from the user. The slot type tells the chatbot what type of response to expect, should it be a number, alphanumeric, just text, a particular time format like DD-MM-YYYY, etc.
Using our above example the Crust slot would have slot type “Alphanumeric” and could work as follows. The prompt would be “What type of crust would you like?” and the options provided are “whole wheat”, “regular thin” or “regular thick”. A user can reply with a slot value that includes additional words, such as “whole wheat please” or “let’s stick with regular thin” and Amazon Lex will still understand the intended slot value.
Thus using slots and intents one can complete pretty much any logic required. Amazon Lex also provides built-in slot types. For example, AMAZON.NUMBER is a built-in slot type that you can use for the number of pizzas ordered. Likewise AMAZON.CITYis for cities in the US. For more information on how Lex works and how one can use it better click this link!
Attached below are a couple of screenshots of the setup we use for our chatbot along with the slots and utterances for each intent. We have a Dining Intent and a Greeting Intent with the greeting used to determine when the user is merely greeting us and the dining intent used to tell the chatbot when they should start attaining the information needed from our customer to make the required restaurant suggestion.