AI has become more popular today due to ever-increasing data volumes, advanced algorithms, and improvements in computing power and storage. The integration of artificial intelligence (AI) with GIS (geographic information systems) creates a new scientific discipline so-called geospatial artificial intelligence (GeoAI). By integrating machine learning with GIS technologies, it is possible to perform insightful spatial big data analyses to deal with unprecedented traffic, pollution, energy demands, environmental issues, public health, and safety concerns in modern cities.
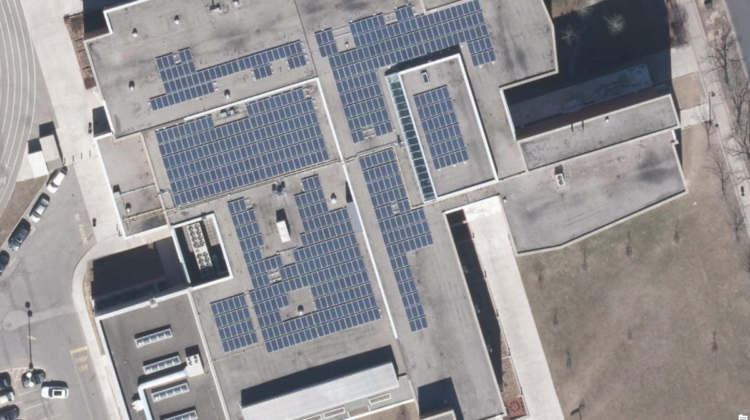
I was recently involved with a solar mapping project about assessing the solar energy potential of building roofs and providing information about solar panel suitability and its associated benefits in Toronto. I found that solar panels have already been installed on some of the buildings. Out of curiosity, I tried Deep Learning to find how many buildings equipped with solar panels.
There are a lot of tutorials and papers about detecting photovoltaic solar panels using areal or satellite images. Here, we’ll learn how to detect solar panels using Deep Learning in ArcPro.
ArcGIS Pro, Server, and the ArcGIS API for Python all include tools to use AI and Deep Learning to solve geospatial problems, such as feature extraction, pixel classification, and feature categorization. ArcGIS Pro allows us to use statistical or machine learning classification methods to classify remote-sensing imagery. Deep learning models can be integrated with ArcGIS Pro for object detection, object classification, and image classification. ArcGIS deep learning toolset contains tools to detect specific features in an image or to classify pixels in a raster dataset. Here are three steps of deep learning workflow such as preparing training data, training a model, and deploying the trained model. Let’s get started by installing Deep Learning libraries for ArcGIS Pro.
All deep learning geoprocessing tools in ArcGIS Pro require that the supported deep learning frameworks libraries be installed. Each version of ArcGIS Pro requires specific versions of deep learning libraries which include a broad collection of python packages, such as PyTorch, TensorFlow, Fast.ai, and scikit-learn, for performing deep learning and machine learning tasks.
Installing Deep Learning libraries for ArcGIS Pro is very straightforward. The Deep Learning Libraries Installer can be downloaded from Esri GitHub (Deep Learning Libraries Installer). For instructions on how to install deep learning packages, see the Deep Learning Libraries Installer for ArcGIS Pro.
Or any other specific python libraries can be installed by using ArcPro Python Package Manager in a cloned active python virtual environment or by executing python package installation commands (pip, conda) in the active python virtual environment. Each version of ArcGIS Pro requires specific versions of deep learning libraries.
(deeplearning) C:Program FilesArcGISProbinPythonenvsdeeplearning>conda install -c esri -c fastai -c pytorch arcgis=1.8.1 scikit-image=0.15.0 pillow=6.2.2 libtiff=4.0.10 fastai=1.0.60 pytorch=1.4.0 torchvision=0.5.0 tensorflow-gpu=2.1.0
Once we’ve installed the deep learning libraries, we can use the Deep Learning Tools to train geospatial deep learning models. Let’s get started by preparing training sample data.
All supervised deep learning tasks depend on labeled datasets. Image annotation, or labeling, is vital for deep learning tasks such as computer vision and learning. It can be done by using Label Objects for Deep Learning and the Export Training Data For Deep Learning tools in ArcPro. The Label Objects for Deep Learning tool is found in the Classification Tools drop-down menu, in the Image Classification group on the Imagery tab. Let’s create a new schema and add solar_panel image class by using image classification tool as below:
Then we can select the solar_panel image class from a random image and start sketching solar panel shape as shown on the image below.
A large amount of labeled data is required to train a good deep learning model. Multiple solar panels can be sketched on some building rooftops.
Data preparation in Deep Learning, especially processing image data, is a time-consuming process. In order to speed up creating training samples, a few hundred samples are created at first.
We can use the Export Training Data For Deep Learning tool to convert the samples into deep learning training data.
The output is a folder of image chips and a folder of metadata files in the specified format. This tool creates training datasets to support third-party deep learning applications, such as Google TensorFlow, Keras, PyTorch, and Microsoft CNTK.
Use the Train Deep Learning Model tool to train a model using PyTorch, or train the model outside of ArcGIS Pro using a supported third-party deep learning framework in jupyter notebook. Let’s start training a model by using the training datasets created in the first step.
# Import necessary ArcGIS Python API tools:
from arcgis.gis import GIS
from arcgis.raster.functions import apply
from arcgis.learn import export_training_data
from arcgis.learn import SingleShotDetector, prepare_data
Let’s define the dataset folder.
data_path = r”C:UsersasulaimDocumentssolarsoldata”
prepare_data function prepares a data object from the training sample exported by the Export Training Data. Let’s check the classes.
data = prepare_data(data_path)
# Checking on the classes loaded with the data:
data.classes
The prepare_data function used approximately 10 percent of the image chips to train the model to recognize solar panels. The other 90 percent is used to test the model’s accuracy. The prepared data can be checked by visualizing a random batch from the training set.
data = prepare_data(data_path, {1:’solar_panel’}, batch_size=32)
arcgis.learn allows us to define a SSD architecture just through a single line of code. Let’s define a Single Shot Detector with the specified grid sizes, zoom scales and aspect ratios.
from arcgis.learn import SingleShotDetector
ssd = SingleShotDetector(data, grids=[4], zooms=[1.0], ratios=[[1.0, 1.0]])
The grid parameter specifies the size of the grid cell, in this case, 4×4. arcgis.learn includes learning rate finder, and is accessible through the model’s lr_find() method, which can automatically select an optimum learning rate, without requiring repeated experiments. Additionally, we are specifying a zoom level of 1.0 and an aspect ratio of 1.0:1.0. lr_find() function runs the Learning Rate Finder and displays the graph of its output.
The learning rate is approximately 0.0017. model.fit() function can be called to fit our model to the training data. Here we are training the model for 10 epochs.
Typically validation loss should be similar to but slightly higher than training loss. It seems the above-trained model is a good fit.
What is the average precision score for the solar panel detections at this point?
ssd.average_precision_score()
It is obvious that the 80% accuracy rate is pretty high at our first attempt with fewer training samples.
ssd.show_results(rows=25, thresh=0.05)
Let’s save the model in the model’s folder.
ssd.save(r”C:devsolar”)
Now the trained model is ready to be deployed.
The above-trained model can be used with the Detect Objects Using Deep Learning tool in ArcPro to generate an output. The detect_objects() function can be used to generate feature layers that contain a bounding box around the detected objects in the image data using the trained deep learning model.
Let’s test a single image. The parallel processing factor can be used to speed up the geoprocessing.
The python script of the above process can be executed in jupyter notebook.
#python script for single image object detection
import arcpy
arcpy.CheckOutExtension("ImageAnalyst")
from arcpy.ia import *
# Executearcpy.ia.ExportTrainingDataForDeepLearning(“test_image”, r”C:UsersasulaimDocumentssolarsoldata”, r”C:devsolarsolar_panel.shp”, “JPEG”, 256, 256, 128, 128, “ONLY_TILES_WITH_FEATURES”, “PASCAL_VOC_rectangles”, 0, “Classvalue”, 0, None, 0, “MAP_SPACE”, “PROCESS_AS_MOSAICKED_IMAGE”, “NO_BLACKEN”, “FIXED_SIZE”)
As shown in the following image, the solar panel detection results (highlighted in orange colour)are pretty accurate.