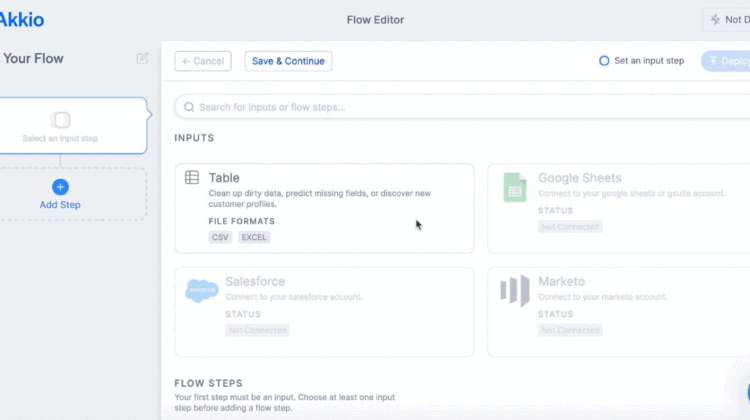
Akkio lets you easily create and deploy AI models. It’s free to try — and even free to start using. So have at it. Here’s a quick look at what you’ll do to create your first AI model.
Maybe you already have an idea — great! Akkio lets you create models to predict:
- Binary outcomes (yes/no, on/off, win/lose, sold/not-sold, etc)
- Numbers (rates, dollar amounts, etc)
- Categories (an outcome when there are multiple possible options)
We’ll add more ways to predict over time and expand beyond tabular data into additional data types, but there’s plenty you can make happen now.
If you’d like some inspiration about what you can predict, check out our Applications section. We show examples of using Akkio to do sales lead scoring, cost modeling, churn detection, text classification, fraud detection, quality monitoring, and more.
Mostly, think about something that’d be useful to you to predict. It doesn’t have to be a “make AI run my whole business” predictive model. Rather, think about predicting a repetitive task you do a lot — anywhere you “eyeball the data” or “have a feel for the data” is ripe for AI. In particular, we’ve seen many businesses benefit greatly from AI’s ability to do natural language processing alongside numerical data — think about data sources where you blend numbers and text.
In AI, you create a model with historical data. If you want to predict a sales win, you’ll want to start with your historical win or lose data. Or if you’re classifying text, start with a dataset of text in one row and associated classification tags in an adjacent row. Right now, you simply upload a CSV or XLS with this data to your Akkio account. In the near future, we’ll make this even easier for you by integrating with the platforms where your data resides — Salesforce, Marketo, Snowflake, etc.
Generally, the more data the better. But, there are diminishing returns on model quality as your input dataset gets really big. And you can often make a great model with surprisingly small amounts of data. The first thing Akkio does with your data is to automatically identify the data type in each column — it identifies input data as a category, text, number, date, unique ID, and so on. If Akkio misidentifies anything here, you can simply change the data type from a drop-down menu and Akkio will learn to do it better next time (this is one place we actually use Akkio to make Akkio!).
Time to make your model. Just select the column you want to predict. Akkio creates a unique neural network for your data, usually in ~10 seconds. Start with the “Fastest” Training Mode. You can eke out a slightly better model when you want by changing your Training Mode to “Highest Quality”.
Here’s what happens under the hood when you train a model. Akkio separates your dataset into a “training set” and a “holdout set” — the holdout set is about 20% of your input. Akkio creates a predictive model with the training set. Then, it runs the holdout set through that model to give you information about the quality of the model you just made. You can see a summary of the results right on the page you’re on or you can go to the Model Report to dig deeper.
You can start by looking at Accuracy — this measures how often the model predicted an outcome correctly. But that’s often not the whole story because something you’re trying to predict could only occur infrequently. You can look at prediction results for each outcome and get a sense for accuracy, false-positive rates, and even prediction-by-prediction probability.
Filtering or densifying the probability of an outcome is almost always valuable to a business. For example, if you’re trying to predict what customers might churn out of a service, it’s a big win to focus your energy on the small subset of “most likely” sources of attrition.
Akkio also shows you which fields have the most predictive power. With this, you can get a feel for what’s driving the outcome of the model.
Now, your model is ready and it’s time to make some predictions. The easiest way to deploy it is with a web app. In the Output set, select “Web App” — you’ll be able to change the title, which fields a user can enter data into, set the site to be public or private, and more. Click “Deploy” and you’re done. You now have a website where a user can enter data and get predictions back, either one-by-one or in bulk.
Many companies will want to pass data in and get predictions out programmatically. That’s where the API comes in. Select “API”, choose the fields you want to pass into the model and click deploy. You’ll get instructions for how to get results back.
And soon, you’ll be able to deploy live models without writing any code through integrations with other platforms you may already use. Think: lead scoring piped directly back into Salesforce, ticket triage piped directly back into Zendesk, prediction-based marketing automation with Zapier, and so on. Let us know what integration you want most.
That’s it. Many users build their first AI model in 10 minutes or less. Check out our pricing and give it a try.
