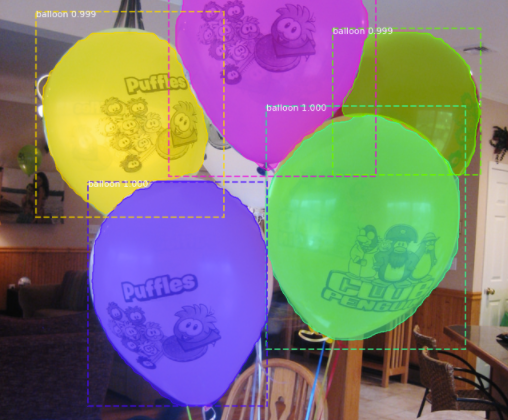
See that picture above? That is what this part is all about.
We will use Matterport’s pre-trained COCO dataset (mask_rcnn_balloon.h5) & and annotated images ( balloon_dataset.zip) to test how the model works and what to expect.
To test the model, we will be using a Jupyter Notebook!
- Head to your Anaconda Navigator and open a Terminal window in the SAME environment that we installed all the requirements in (in the previous part).
- Navigate to your ‘Mask-R-CNN’ directory that was cloned from GitHub in the previous part.
- Type in
jupyter-notebook. This will open up our Jupyter Notebook! - Navigate to /samples/balloon/ and open the inspect_balloon_model.ipynb notebook.
Navigating to your file directory!
- Open up the Jupyter notebook. It should look like this:
2. If you have followed my exact file structure (from Part 1), then you will not have to make any changes to this script. You can skip to Step 6!
3. Look out for all the #MUST EDIT! . Modify your ROOT_DIR to the directory of the Mask-R-CNN file. It could be as such:
4. Change your BALLOON_WEIGHTS_PATH . os.path.join combined directories together. Therefore, your BALLOON_WEIGHTS_PATH could be:
5. Change your BALLOON_DIR to the folder which consists of the images (the balloon dataset). It could be:
Alright! Now the script is ready for us to play around with 😃!
Just press SHIFT & ENTER in every block. I have added a small print statement that will show you “Completed!” after the code in each block has been executed.
Wait to see this “Completed!” before executing the next block!
And there we have it! Now you should be able to run this detection and segmentation model! Stay tuned for Part 3 on how to create your own segmentation model FROM SCRATCH!